
Blogging with Free WordPress Blog Software
Setting up a blog with blog software is little more complicated than using a blog service. Online service allows you to create a blog using step by step instructions and you don’t need to deal with lots of scripts and databases. Blog software however, requires you to put little more work. But it’s worth it if you want to look professional and have a blog on your own domain.
In this tutorial you’re going to create a blog using WordPress blog software. WordPress is open source, which means it’s absolutely free to use. It is little more complex than Blogger service (for example), but if you spend some time discovering new features of this software, soon you’ll know how to configure it according to your own needs.
Downloading a WordPress Blog Software
The first thing you need to do is download the blog software. Go to WordPress homepage, click on “Download” link and download the latest WordPress version in “zip” format. Extract the files onto your desktop or any other folder. You’ll see a folder called “wordpress”. You can change the name of this folder right now to “blog” or anything you want. We’ll assume the name is “blog”. So your blog will be accessible via:
http://www.domain.com/blog/
Go to the extracted folder and open the file called “readme”. It explains you how to set up a WordPress on your server. We’ll try to cover this process little bit more detailed. Basically what you need to do is create a database in your host control panel, configure one file in the wordpress folder, upload everything to your server and follow a few steps to finalize the installation process.
Creating a Database
First of all, your web host should allow you to create databases on your account. If it doesn’t, you should change a host. We’ll assume that your host uses “cPanel” as your control panel. If you have a different control panel, learn how to create databases using that panel.

 Now, login to your control panel using a given username and password. Click on the “MySQL Databases” icon and you’ll be taken to a web page where you can create a database for your WordPress blogging software.
Now you’re going to name and create a database, user with password and assign the database to the user. Keep in mind that the information you put here is private and you shouldn’t give it away to anyone.
Let’s say you name your database “mydb” (of course you should name it differently for security purposes). Now click on the “Add Db” button. You’ll see a confirmation that your database was created. Now go back and enter a username with password. After you click “Add User” you should also see a confirmation message. Now go back, select user, database (as shown in step 3 above) and click “Add User to Db”. Again, you should see a confirmation that you’ve assigned a user to the database.
After this process, the MySQL account maintenance window should look like this:


When you add a user to the database, you’ll see a page with a snippet of code. That means that you have successfully created a database. One more thing you might notice that your username is not just “user”, but “account_user”. The name “account” is your hosting account’s name. The same is with a database. So when entering these variables later in the WordPress configuration file, keep in mind that you’ll need to add full names (with account name probably).
Uploading and Editing WordPress Files
After you have successfully created a database, leave it for a while and go to the wordpress folder (that you’ve renamed to “blog”). Now copy the blog folder with all the wordpress files inside and paste it into your website’s root folder (if you have an offline version of your site). Otherwise, you can upload the folder to your server from a desktop. Now go to the blog folder and open a “wp-config-sample” PHP file with WordPad or Notepad. Change the values to your own:

Now go to your MySQL account maintenance page in control panel. Copy the full database, username values and paste them into the wp-config-sample file. Also include the password. Localhost should be left as it is. Now click “Save As”.

 Remove the “-sample” part and don’t forget to add “.php” at the end so it looks like in the image on the left. Click “Save” button and you’re done.
Now upload the “blog” folder with all the files to your server. Open your web browser and type in the following:
http://www.yourdomain.com/blog/wp-admin/install.php
You should see a window, like the one below:

Click on the “First Step” link and you’ll be taken to a page where you’ll have to enter the title for your blog and your email address.


Click “Continue to Second Step” button. You’ll see that there’s actually nothing more to do. Now the tables for your WordPress blog are created.


Remember the username and password that you’ll need to use to login to your blog’s admin area. Better write it down somewhere. Now click the “log in” link or go to:
http://www.yourdomain.com/blog/wp-login.php
Type in the “admin” (this is the same username for everyone) and type in the password that you’ve written down.
Actually, if you have entered the correct email, your username and password should arrive into your inbox.
Now after you login, you should see admin area (otherwise called dashboard) on the screen. Click on “Write a post” link. You’ll be taken to a posting page.

Write your title and message. Click on “Publish” button and your message will be posted.

You can view your blog by clicking a “View site” link at the top.

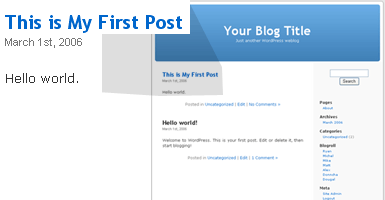
This is how your first post will look like. You can of course change the look of your blog template. Go to “Presentation” section and you’ll be able to switch the template or download and install new templates. You an even create your own template if you know CSS or little bit of coding. Explore the admin area and learn more about WordPress capabilities. You can get many plugins online that make this open source blog software even more powerful.
Adding a Link to RSS Feed on Your Blog
The last step you need to do is add a link to your blog so people could subscribe to it using RSS readers.
There’s actually a link at the bottom that allows to subscribe to a feed, however the syntax looks little different and when people click on that link, sometimes they see a blank page.
feed:http://www.yourdomain.com/blog/?feed=rss2
You can change this. Go to your blog folder that resides in your website’s root folder. Then go to:
blog > wp-content > themes > default > footer.php
Open the footer file and find this line:
<a href="feed:<?php bloginfo('rss2_url'); ?>">RSS (Entries)</a>
Change it to this:
<a href="<?php bloginfo('rss2_url'); ?>">RSS Feed</a>
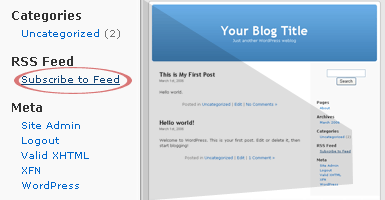
Do the same with “Comments (RSS)” line (the line below). Now upload that file to your server and this should fix the problem. You can also add a subscription link at the right navigation panel. In your admin area (online), go to “Links” > “Add link”. In the URI field enter the link to your feed (copy the link shortcut from the bottom of your blog) and enter a link name, like “Subscribe to RSS Feed”. Click “Add link”. You’ll see that your blog looks like this:

You can edit all the categories and links in “Links” area. You can also manage how the messages are archived, whether to allow readers post comments or not and more. Simply browse and test different things in admin area. Don’t worry if you publish some unwanted messages. You can delete them later.
That’s all for creating a blog with WordPress blog software.
Summing Up
If you are planning to make money with your blog and constantly adding new content to it, choosing blog software as your blogging platform is a good idea. Such software like WordPress or Moveable Type is very flexible and allows you to run a blog on your own domain. This way you look more professional than folks having a free blog account on some blogging service.
WordPress is very good blog software. Even if it seems that there are not many options at a first glance, you’ll soon realize that it’s very flexible. There are tons of free plugins for WordPress online that you can add and expand its possibilities significantly.